The Beginner's Guide to Orthanc
For medical physicists, physicians and general practitioners. :)
(by Emsy Chan, 2015-02-09)
Step 1: Downloading and Installing
This tutorial focuses on the pre-built Windows binaries.
Downloading
The latest version of Orthanc for Windows is available at http://www.orthanc-server.com/download-windows.php
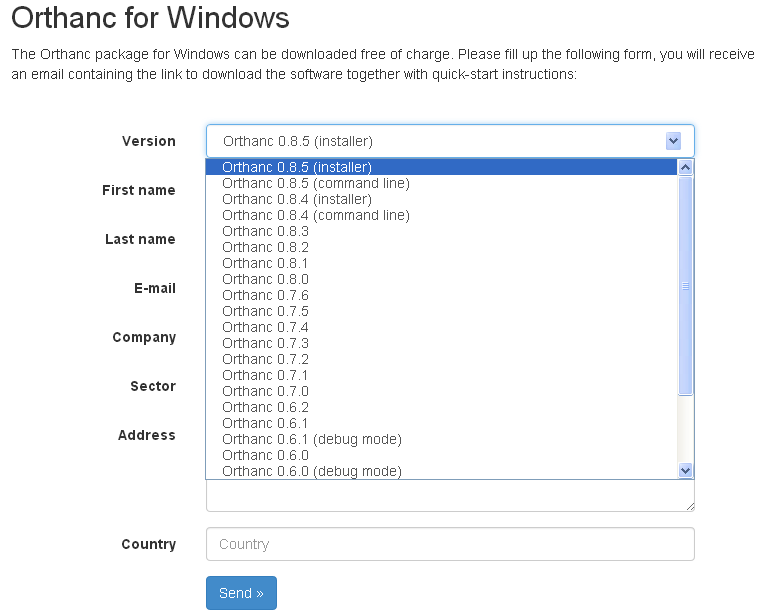
There are 2 available versions:
Installer: which will install Orthanc as a service (i.e. it will run automatically in the background)
Command Line: which will install Orthanc into a folder, where you'll have to run it manually from Command Prompt
For purposes of this tutorial, please download the Installer version.
Fill up the form to receive the download link in your e-mail. (Don't worry, you won't receive spam from the developers.)
Installing
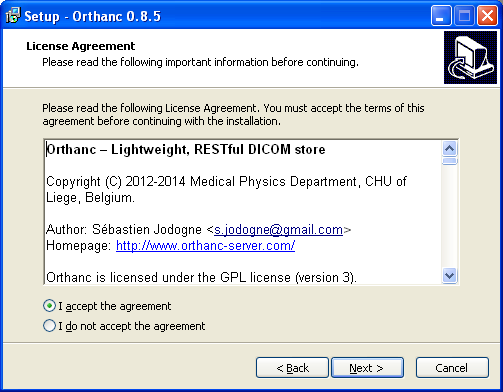
When you run the downloaded file, you'll probably receive some sort of security warning. Click "Run".


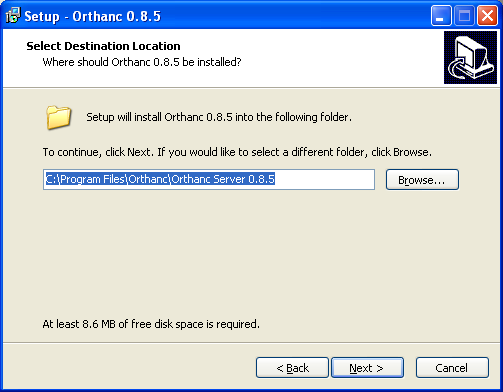
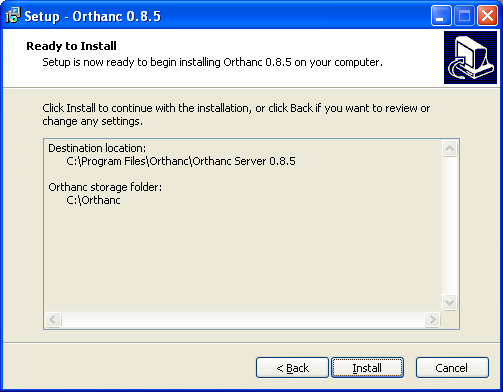
This will be the folder where the Orthanc program files will be installed:
This will be the folder where Orthanc will store:
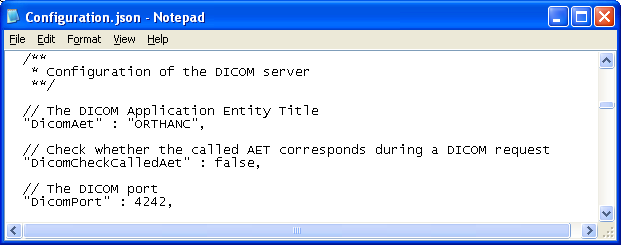
Configuration.json: The configuration file, which you may need to edit later
DICOM files: The actual DICOM files loaded into Orthanc
Index file: The database Index that Orthanc uses to access the DICOM files
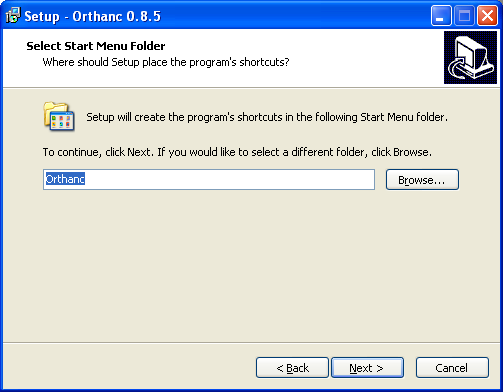
The default folder is Orthanc in your C: drive.
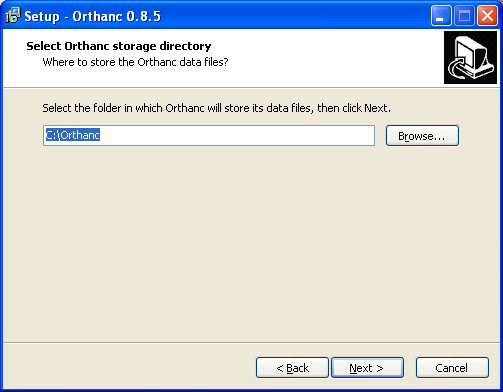
By default, Orthanc will install shortcuts in your start menu, which you can use to find the all-important Configuration.json file.
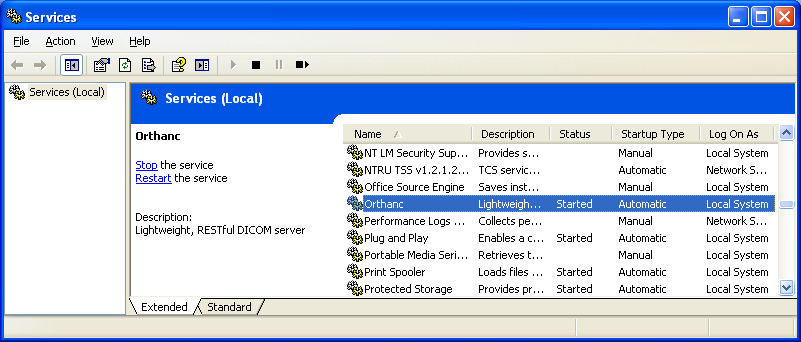
Checking the Installation
At this time, your PC will be running Orthanc in the background.
To check the status of the service, click on Start (Run) and type in services.msc
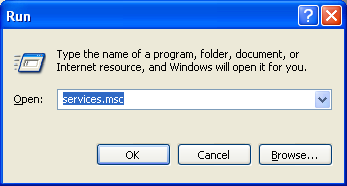
Orthanc should be running as a service.
Please remember this step, because you'll need to restart Orthanc every time you make changes in Configuration.json
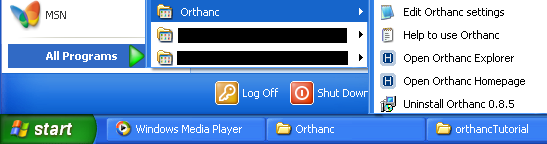
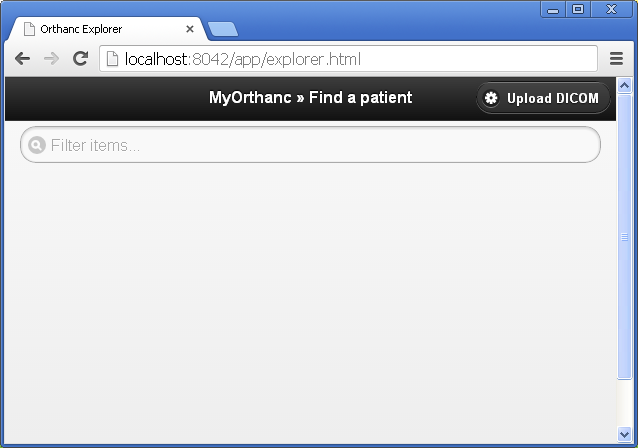
Step 2: Orthanc Explorer
Starting Orthanc Explorer
If the installation was successful, Orthanc Explorer can be accessed through http://localhost:8042 in your web browser.
Alternatively, the link named "Open Orthanc Explorer" will be available in the Start Menu:
A basic overview of DICOM files:
I can't seem to continue this tutorial in a coherent manner without making sure everybody knows some basic DICOM.
Those who already know some basic DICOM can skip to the next step.
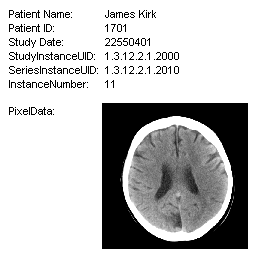
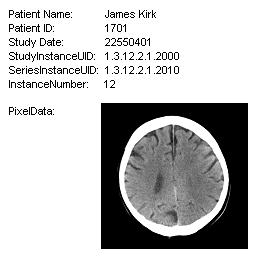
- Every medical image exists as a single DICOM file. For example, a 30-slice CT Brain consists of 30 separate DICOM files.
Except for multi-frame DICOM files, which we will ignore for the moment
- Each DICOM file contains information about the patient, examination, image, etc in the form of tags in addition to the image itself (which is called PixelData).
A single DICOM file is also called an instance.
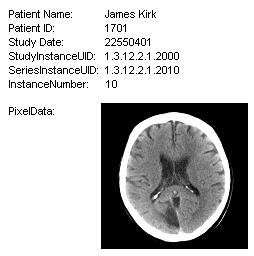
- A DICOM series occurs whenever a few DICOM files share a similar tag called SeriesInstanceUID. This results in the stack of CT images that you scroll at the console.
- A DICOM study occurs whenever a few DICOM series share a similar tag called StudyInstanceUID
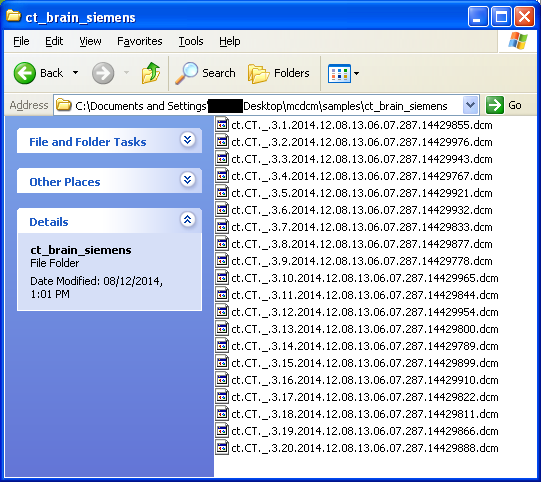
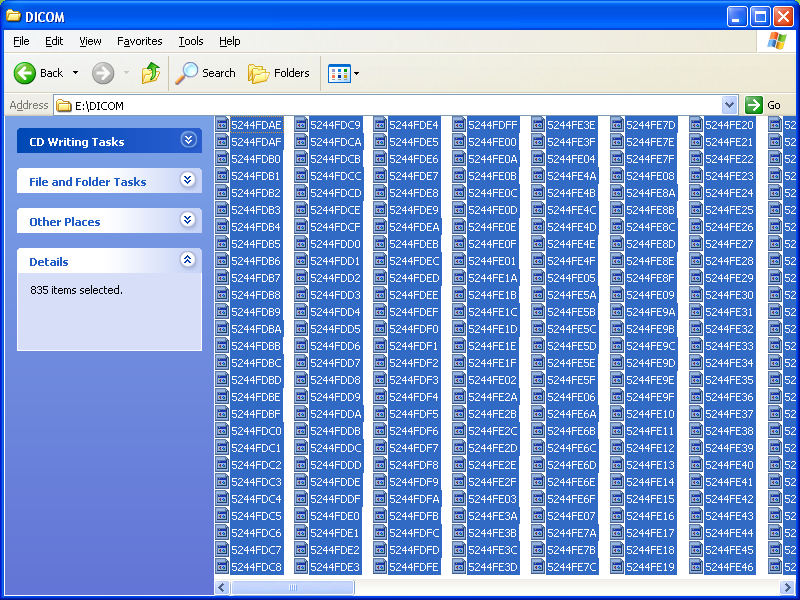
- DICOM files usually have a .DCM extension. For example, the files for a 20-slice CT brain are seen in their folder:
- DICOM files on CDs usually do not have an extension, but can be recognized by their "non-sensical" names, number and size.
Of note, because each slice is a single DICOM file, the number of files approximate the number of expected slices in that study.
As a rough guide, a CT / MRI file ranges from 200kB to 520kB; whereas a radiograph ranges from 5Mb to 10Mb. The example below comes from a CD of CT images.
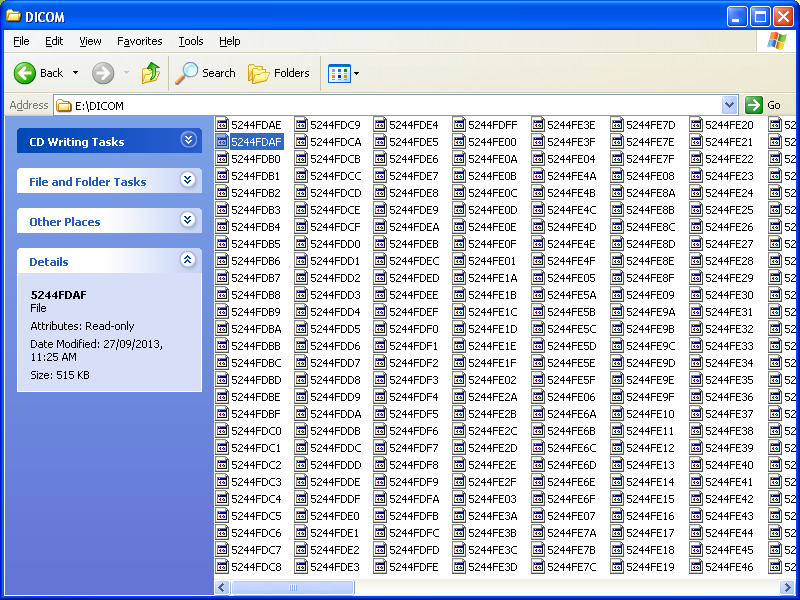
- The CD actually contains 800+ files in its DICOM folder which come from a few different CT series. However, it doesn't matter how you upload DICOM files from different series at once because the server will group these images based on the DICOM tags.
This method of filing is called flat because everything is in one folder.
- CDs with medical images may put the DICOM files from each individual series into individual folders. This is called heirachical so you'll have to figure our which folder contains which series.
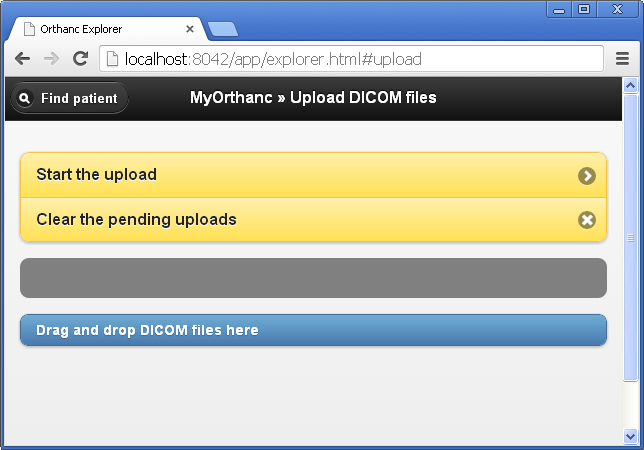
Uploading DICOM images into Orthanc using Orthanc Explorer
Now that we know how to find the DICOM files, it's time to upload these files into Orthanc!
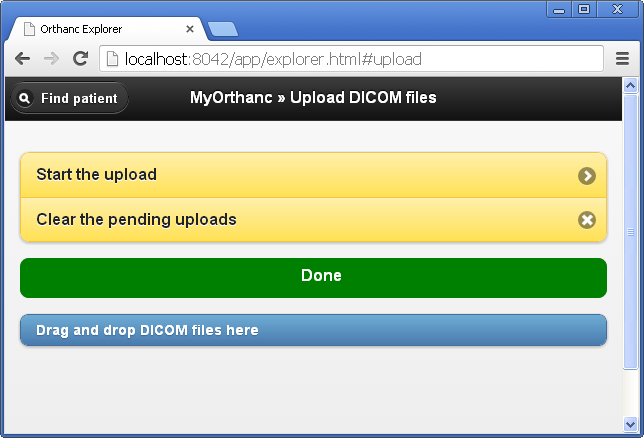
Click on Upload DICOM at the top-right corner of Orthanc Explorer and you will be brought to the upload page.
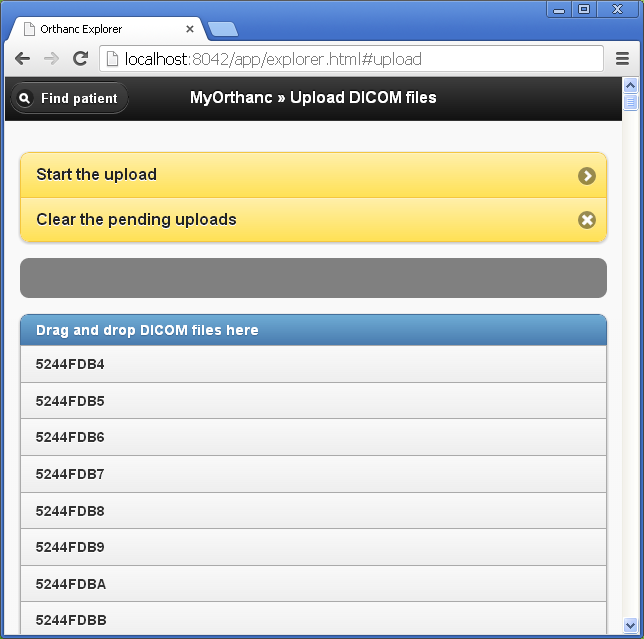
Using Windows, open the folder that contains the DICOM files. Simply select the DICOM files (Ctrl-A helps!), and drag those files into Orthanc Explorer.
--> 
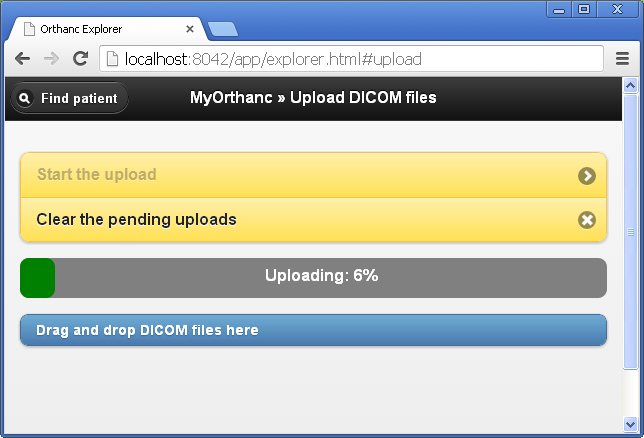
Hit "Start the Upload" and wait until the upload is complete.
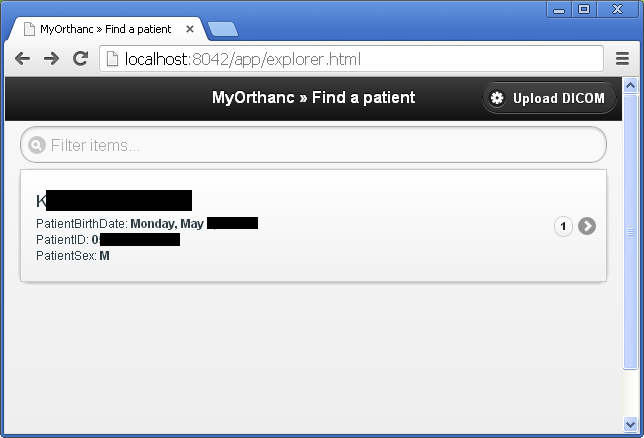
Return to the Orthanc Explorer home page to view your uploaded DICOM files.
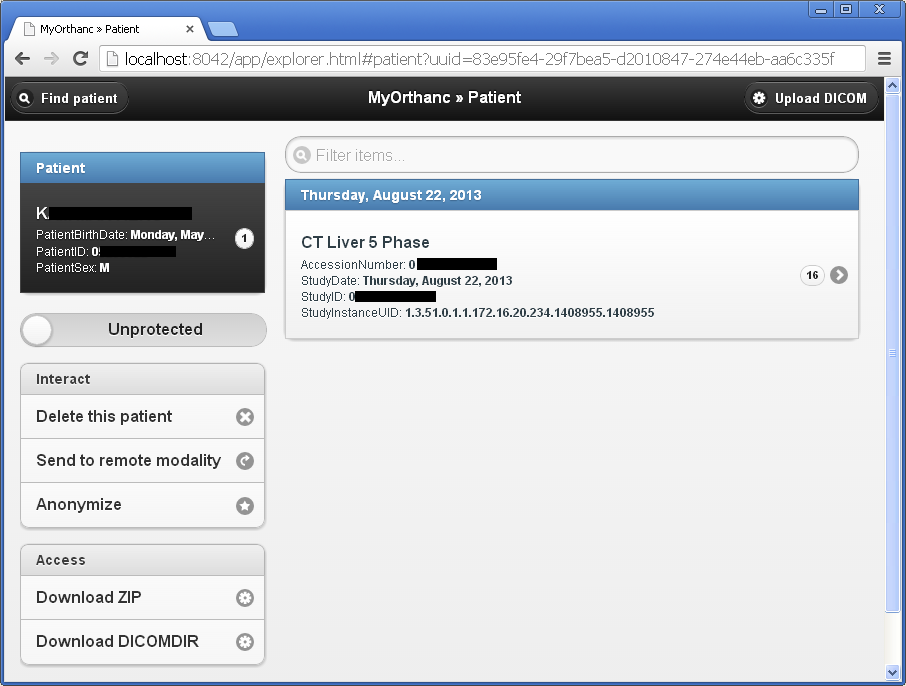
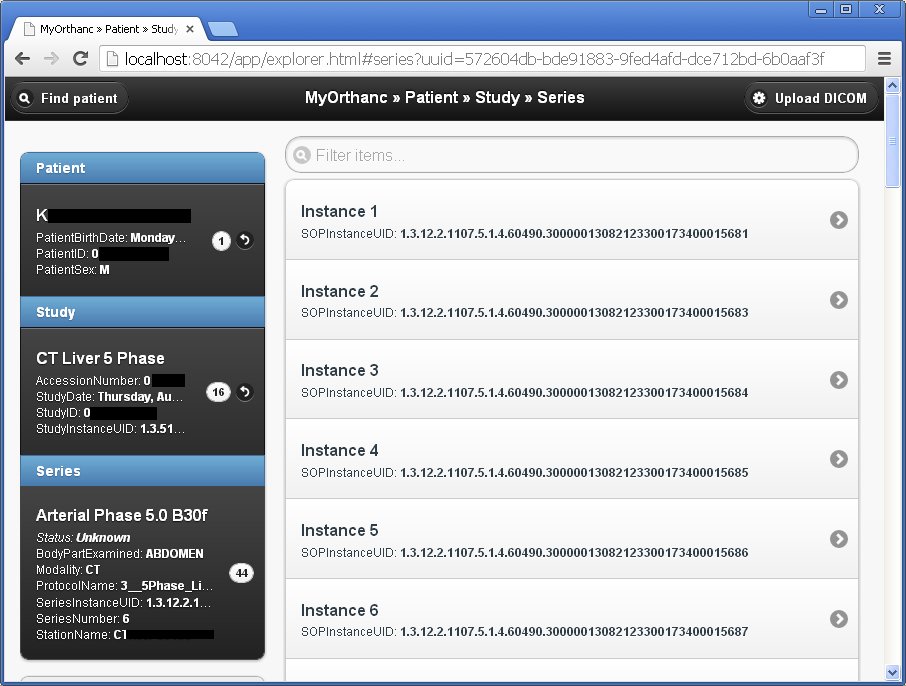
Note how Orthanc has classified 800+ files into 1 study which contains 16 series. One of those series (pictured below) contains about 44 instances.

Congratulations! You've managed to upload local DICOM files into Orthanc!
Step 3: Configuring Orthanc
Here's the FUN part!
A very basic overview of PACS networking:
Some basic PACS knowledge is needed to configure Orthanc successfully. Those who have basic PACS knowledge can skip this part.
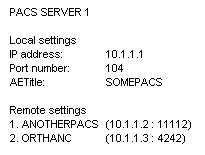
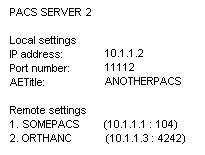
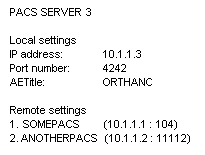
- Each PACS server is a computer that is linked to another computer (another PACS server) through a network.
- Each PACS server has its own settings (local settings):
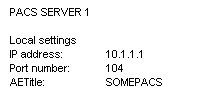
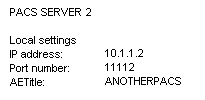
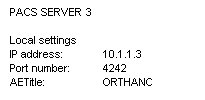
- Important settings are the:
- IP address: Which you can get from the computer's networking information
- Port: The port where the DICOM information will pass through. Usual ports include 104 and 11112. The default Orthanc DICOM port is 4242.
- AETitle: The Application Entity Title is the "name" of the PACS server
- Each PACS server must know the remote settings of the other PACS servers it wants to communicate with:
Finding Configuration.json and Restarting the Orthanc Service
You can open Configuration.json in Notepad using the shortcuts in Start Menu (Edit Orthanc Settings).
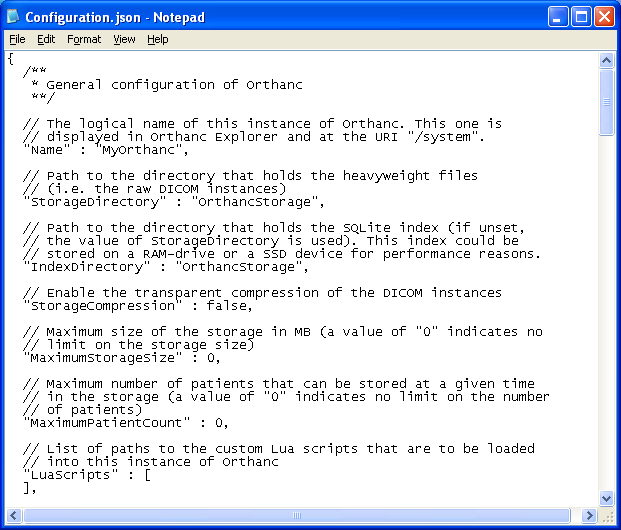
After editing, make sure you restart the Orthanc service to apply the changes!
Configuring the Local Settings in Orthanc
You'll need to know the local settings of Orthanc to configure the remote PACS server.
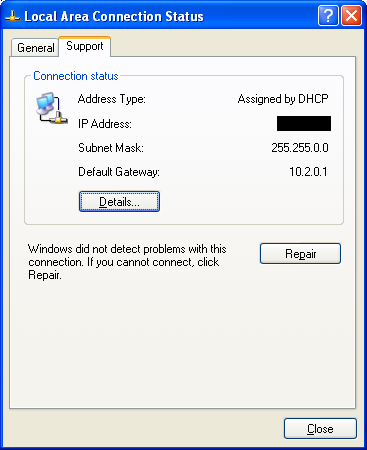
Get the IP address from the little network icon at the bottom right of your Windows screen (or from Control Panel).
Get the AETitle and DICOM port from Configuration.json.
Configurating the Remote Settings in Orthanc
You'll need to know the settings of the remote PACS server to be able to enter it into Configuration.json.
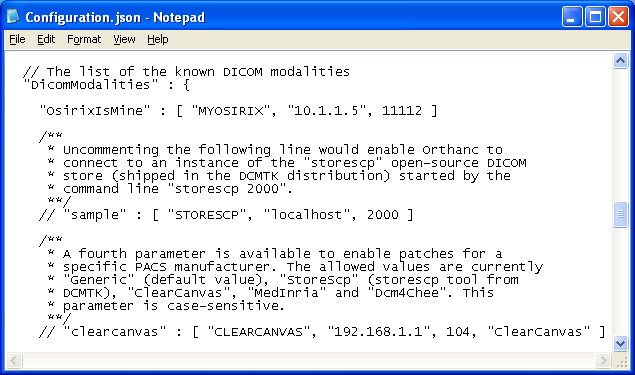
Let's say you have an Osirix running on:
- IP Address: 10.1.1.5
- Port number: 11112
- AETtitle: MYOSIRIX
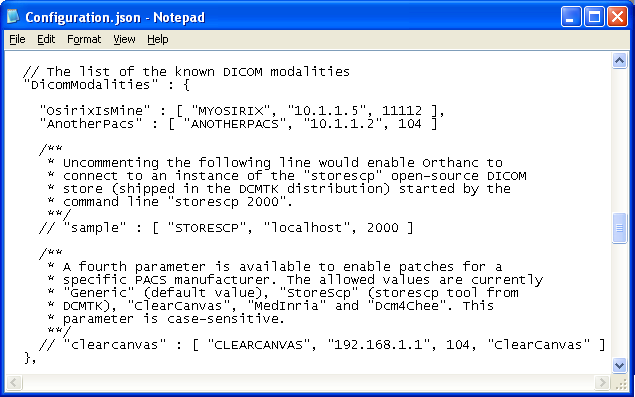
Find the following in Configuration.json:
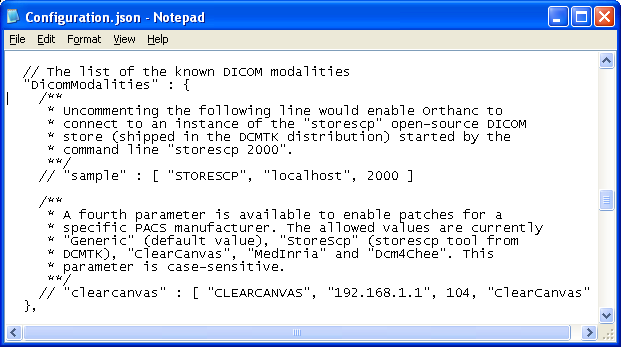
Add the necessary information according to the syntax.
The 1st parameter (e.g. "OsirixIsMine") is what will appear in Orthanc Explorer. It can be anything you want.
However, the 3 other parameters must match the remote PACS server's settings.
Note that if you are adding more than 1 remote PACS server, you'll need to add comma "," between the entries.
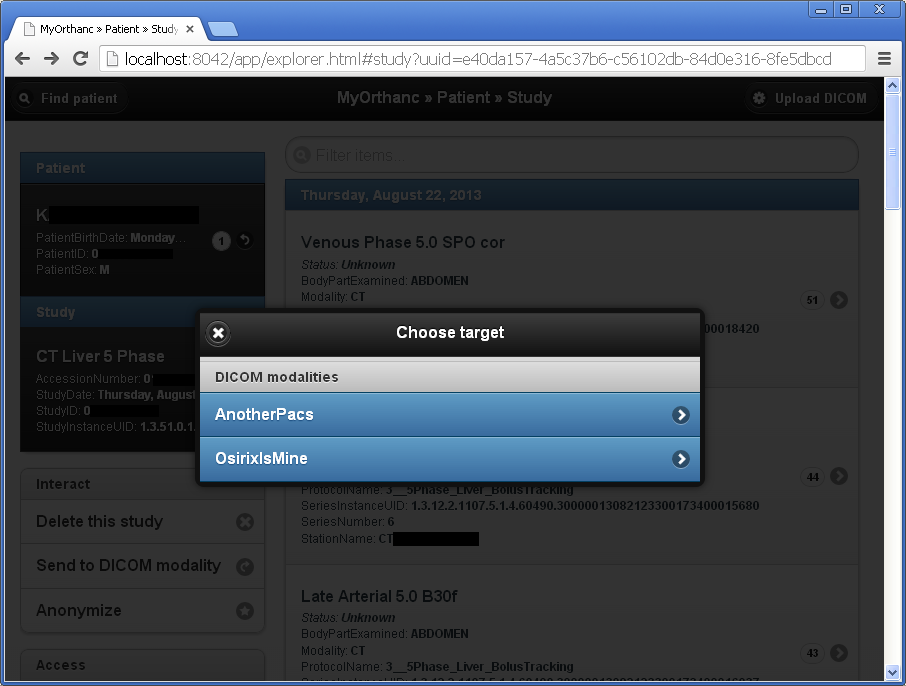
Sending DICOM files to a Remote PACS
In Orthanc Explorer, browse to the Study / Series / Instance that you want to send, and click on "Send to DICOM modality"
Configuring Web Browser (HTTP) access
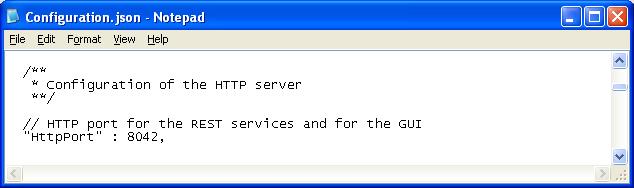
Note that the default DICOM port for Orthanc is 4242, whereas the default WEB (HTTP) port is 8042.
That's the reason you need to enter http://localhost:8042 to access Orthanc Explorer.
You can change the HTTP port number in Configuration.json.
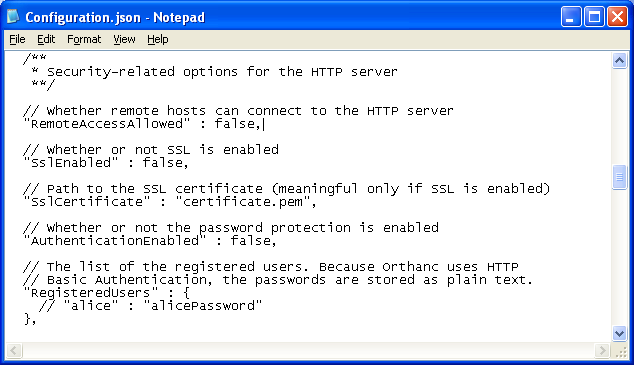
If you want to access Orthanc Explorer from other computers besides the one you installed it in, you'll need to allow remote access.
Simple change it to "true". Don't forget the comma (,)!
DICOM Communication Tests
At the moment, Orthanc allows you to test the connection between PACS servers using REST, but that is beyond the scope of this tutorial.
However, you can use the "C-ECHO" or "Verify" option on the remote PACS servers to test the DICOM connection to your Orthanc server.
Further Questions?
This tutorial is meant to provide basic knowledge on how to get Orthanc running in a Windows environment.
For more information, please visit the resources page.
If you need any help, please visit our forum!
orthanc beginners tutorial / emsy / 9th Feb 2015